While this website is fairly new, over the years we’ve documented most of the repair and refurbishing process furniture goes through in our workshop at thewitsblog.com. Actually that blog turned 5 today. Whaaaaaa! (It doesn’t beat my food blog, thedabble.com, which is over 7 years old.) I’ve provided tips, talked about tools, shared resources for collecting pieces, wallpaper, hardware, paint/oils, anything that deals with the ins and outs of repairing wood furniture and painting furniture.
This just happens to be the first official entry (beyond the intro) on this new website, so I thought a “before and after” post would be a good way to kick things off. (We have 6 dressers and a few vintage pieces on the market right now and, if I am on top of things, there will be another “before and after” in the next week or two.)
Before that, I feel I should explain ourselves a little more regarding this confusing information about other websites and identities. Or maybe you don’t care and you can scroll to the photos of the before and after, be my guest. Do your thing. I’ll continue for those that are curious.
We spent years as the Wits in the Midwest. The Wits refurbished furniture and houses. We split thewitsblog.com between furniture and home talk then the Wits became more the side of us that design and remodel homes with very little talk about furniture. (I’m your lady if you also want to talk home design btw.) After college, about 2007, Greg was hired to work as an engineer in Eugene, Oregon…then it all fell through. The economy tanked, we were swimming in student loan debt, and just trying to get by in our home state, Indiana, while helping out family. I worked in social work, things were quite different for us.

Our house in Northfield, MN sold quickly in 2014 and we hit the road with our dogs in a matter of days. Many of the dressers and vintage furniture we brought with us here to Washington were packed in that truck. I sold some items and left behind others…things I wish I had now. We got by for weeks with only what was in the cargo carrier on top of our Forester. After visiting family and friends, we stopped in well-known cities, parks and sights across the United States. We loved it.
Instead of PNW, we moved to Minnesota in 2008. It broke our hearts when that job in Oregon was a no-go, but it also gave us a goal. We’d fallen in love with the PNW, it was too late, so the two of us vowed to get here someday. It took 7 years of hard work and here we are, still working on our dreams, still moving and shaking. We saw the change of scenery as a chance to separate the two and that’s when Em & Wit was born. Well, born after spending a year focusing on fixer upper house #2 in the Seattle area and neglecting our furniture passion. Should you come by our home shop you will probably walk in on one of our home improvement projects. It’s the norm around here. And 2 barking dogs who really want you to toss a frisbee in our yard…for hours. Don’t worry, that is not required, and we’ll take care of our adorable, knucklehead pups.

We went the opposite direction after our house sold, going to visit family in the Ft. Wayne area of Indiana, then we made our way, on a spectacular trip, to the Seattle area.
Recap: Em & Wit is about furniture. The Wits is about home improvement. Midwest->PNW. #lifegoals
Let’s start on this first before and after. There are almost always before and afters to share when it comes to our work. Those are some of the best parts, right? I think so.
Tangent-I am a home improvement blog buff, as well as, stalker supporter of other furniture refurbishers. You can’t beat the here’s the awful looking thing and now here’s the same thing but waaaaay better. My usual reaction spans from that can’t be the same thing?! Amazing!…to simply clapping in approval and bewilderment like a weirdo or saluting. Can you tell I still high five? Of course you can.
But yes, there’s a great community of refurbishers and I like to think we inspire and support each other. It’s not just slapping paint on something. Contrary to what some have said to me, I don’t think we see each other as competitors either. Gotta stick together. I bet we would bond simply on the number of times we meet those people who tell us they don’t like wood furniture painted (how dare us). Some of my favorite furniture refurbishers include Barb Blair of Knack, Amanda from Ferpie and Fray, Marian from Miss Mustard Seed, Jelena from Poppyseed Creative Living, all the people at Chairloom, and probably a dozen others. Who inspires you?
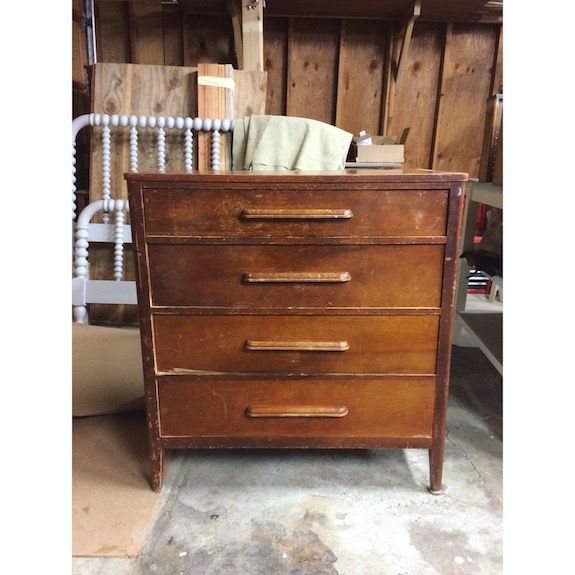
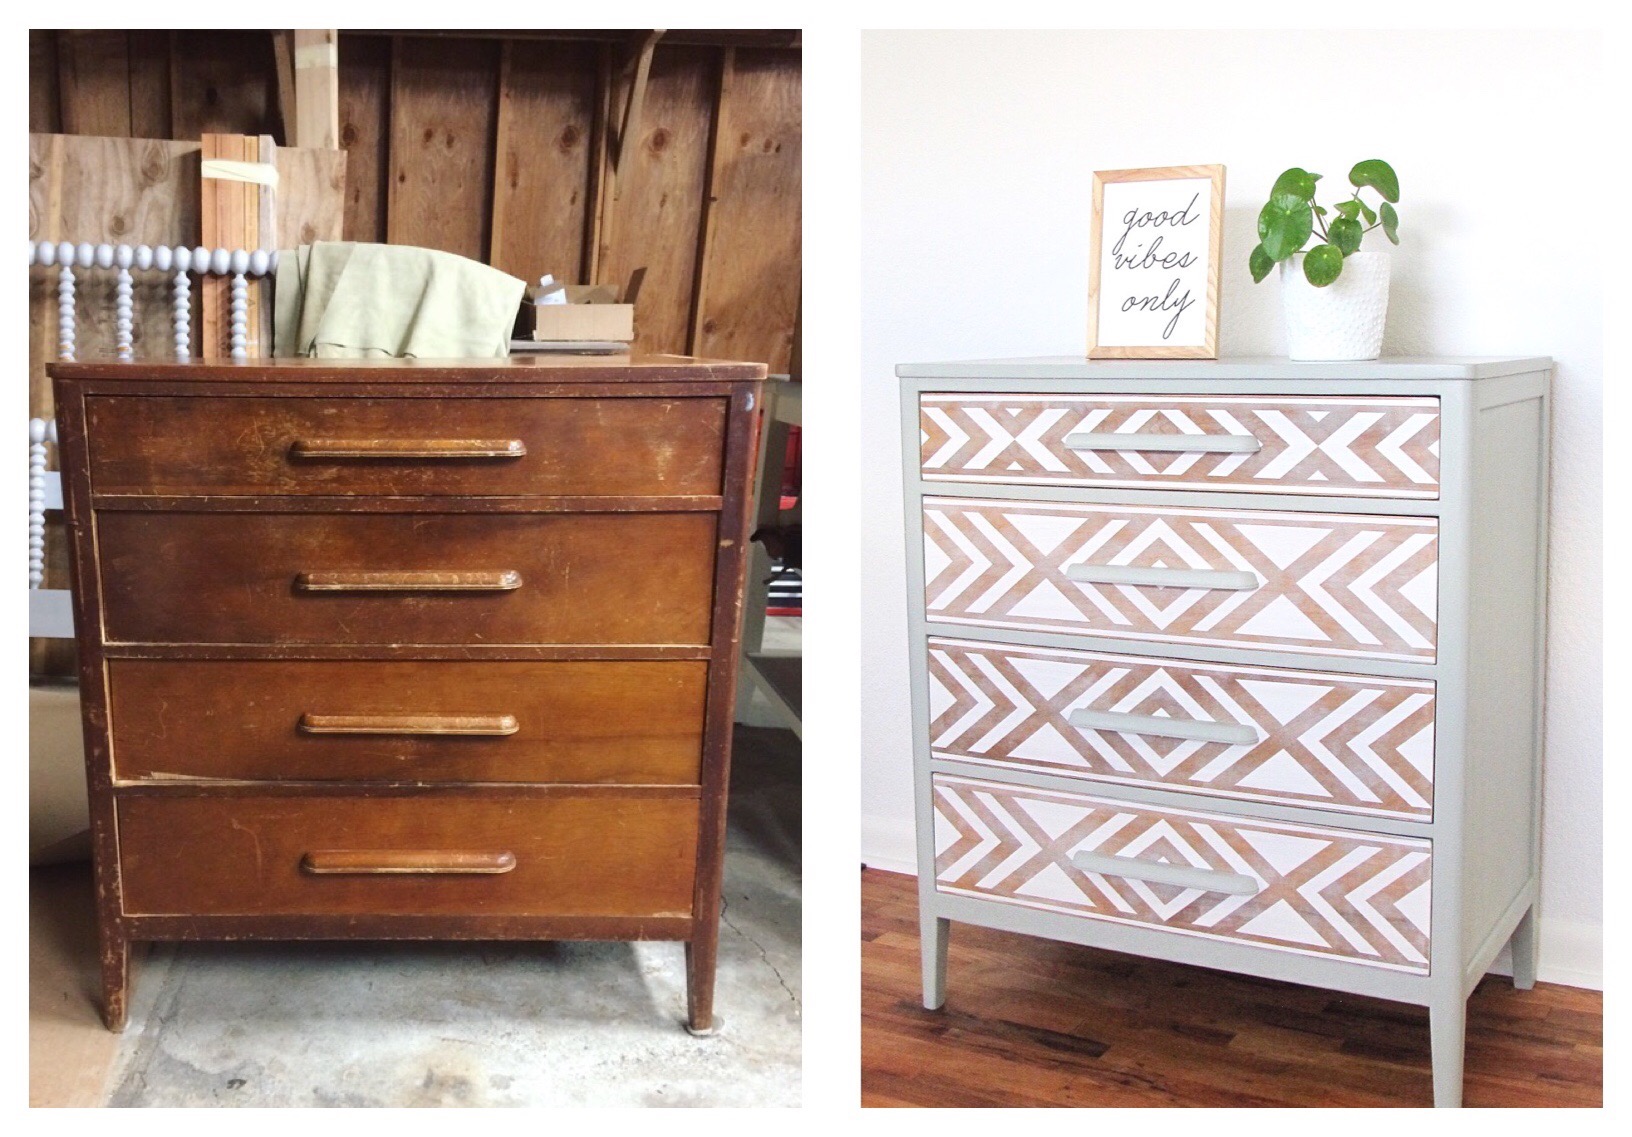
Before
This dresser. Come on, Annie. This is a piece that came from an area not far from where Greg’s engineering day job is. It belonged to the parents of the craigslist seller. It needed some repairs for it to function as storage, i.e., drawers no worky. We typically have to spend some time adjusting the drawer glides so it functions and slides well. Every piece gets a little wax on the glides to help as well as a good cleaning with oil soap.
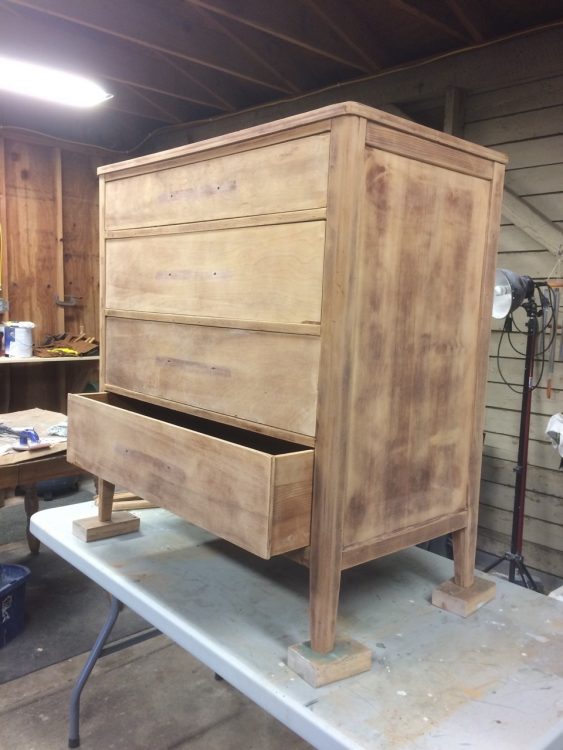
Sometimes we have to take things completely apart and put them back together. Glue, nails, screws, clamp action, replacement wood pieces, but not this one. The dresser had a number of dings and things you can expect over time-it’s over 40 years old-dings and scratches mean wood filler to us. Oh, and sanding. There’s always a lot of sanding. #somuchsanding
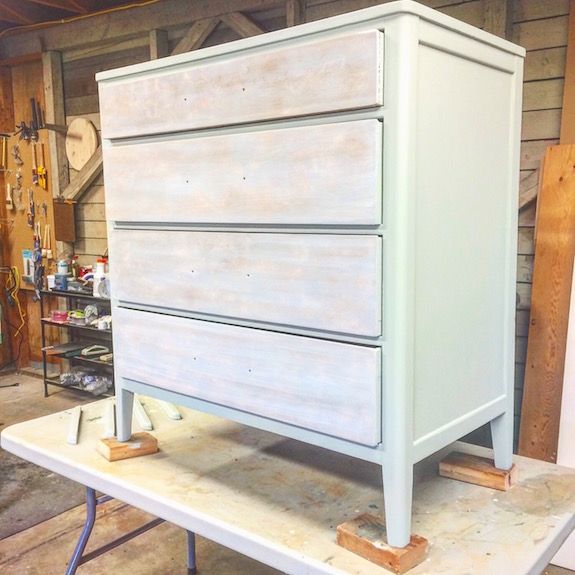
I loved the wood pulls spanning the drawer fronts with a deco-ish look. I love picking out hardware, but it’s also nice not having to do a garsh darn thing in that area. Each piece usually speaks to me about the look early on. Did you imagine me holding my hands over a dresser trying to feel its aura or summon its spirit? Basically. Ha, I kid.
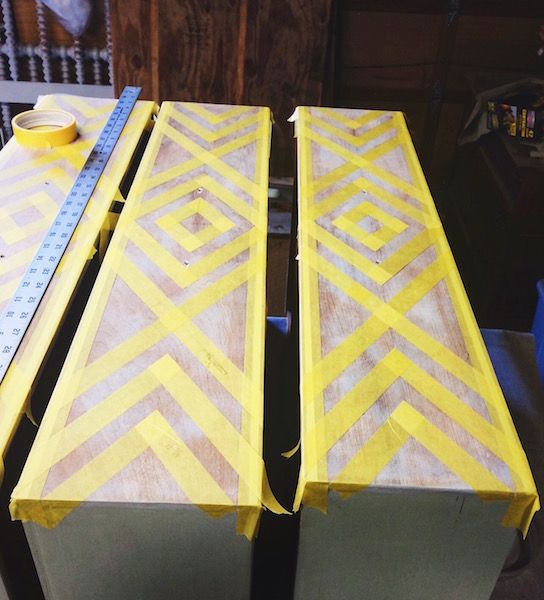
I really wasn’t sold on the direction for this one, then it dawned on me a few days after picking it up to stencil the fronts. But the stencil didn’t arrive, the seller didn’t even recognize my order, and I was ready to go. So I took out my tape and ruler/yardstick with a similar design in mind. It took a full afternoon getting it just so and then a few paint touch ups the next day where the tape peeled some of the paint off.
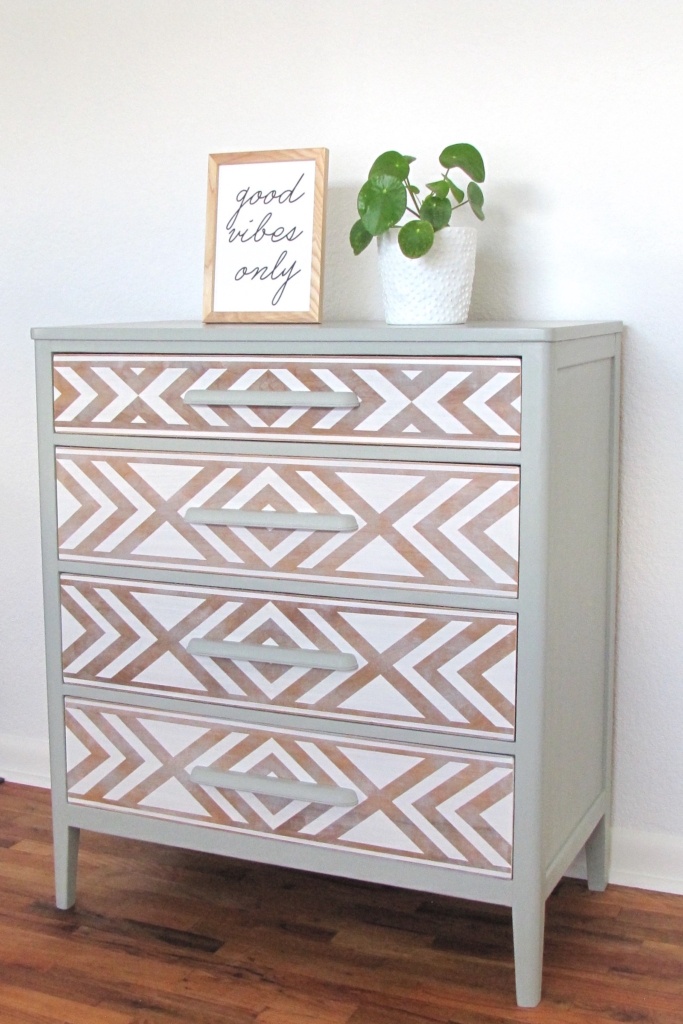
After
I wanted more of a light glazed look under the design to play off of the body color. I mixed a few custom glazes, one in the gray family and the other in the blush pink/coral area. A subtle background color you may not even notice. Brushed both on, wiped it off after about a minute, followed by a light sanding with a sponge until I got the desired look. The body is our custom paint blend in a matte, green-gray (maybe even considered dusty mint). I don’t have an exact process for the coats, I just pay attention to how each piece responds. If the piece of furniture requires you to strip it with chemicals versus just sanding with an orbital sander, it will make a difference in the appearance of your finish. It depends what kind of finish was on the piece before, a super glossy hard-to-remove finish versus something you can pretty much rub off and…oh, there are different ways to address each piece. It is truly one of those things you get a feel for the longer you do it and we’ve done it through trial and error. We started off in a waterless, powerless garage in Minnesota, doing everything by hand, which wasn’t new to us, but sounds impressive. Remember, Greg is a wood ninja (wood product engineer who studied dendrology-study of trees- while working on woodworking projects, making his own furniture mostly, in college).
I finished both the body and drawer fronts with tung oil. We heart tung oil around here. We used dark tung oil on our butcher block countertops in our last 2 houses.
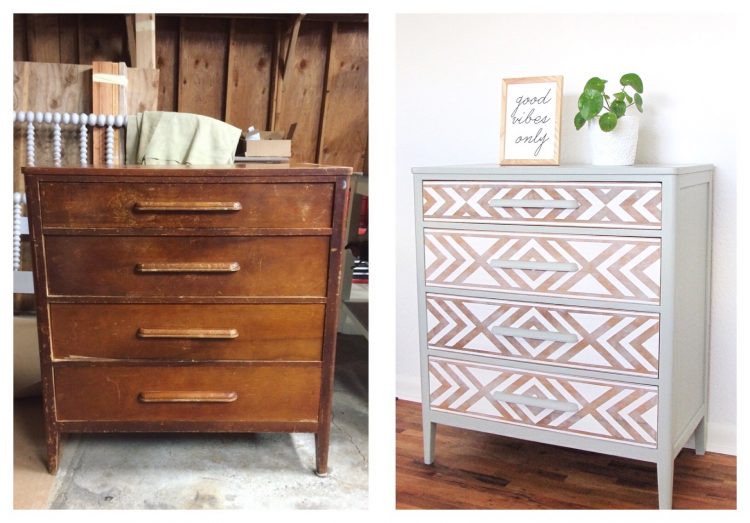
I’m extremely happy with how it turned out. It’s in the shop now $450 + tax to those in and around Seattle/Tacoma.
*I promise my other posts won’t be this long and/or I will try to get to the point faster.
~Annie (Em)
2 thoughts on “Before and After: Tribal Dresser”
Comments are closed.

I love it. I just used masking tape to make stripes and when I took it off a lot of the paint came off too – so the stripes are super messy and wonky. Why did that happen please? Was it the tape? The paint? And how can i clean it up? X
Thank you! Masking tape sadly is not very friendly to wood surfaces. The tape makes all the difference on this project. I go for the yellow delicate surfaces tape from Frog Tape. (I do not care for the blue painter’s tape. I learned the hard way on another project with the blue.) There will still likely be touch ups, but nothing like it is with other tape. One trick I’ve read but have yet to try is this (probably easier just to share the link) from Good Housekeeping .